How to Make a Dish Scrubbie - how to wash dishes at restaurant

These dishes are easy to make!
My grandmother has been making these for years and taught me how to make them when I was a teenager.
They will make some great holiday gifts and party gifts.
In fact, during the summer before the wedding, I sat there with my mom and grandmother and made more than 50 pink dresses for the guests who took part in my bridal shower.
They were very beautiful on the table in the basket.
They are simple to make and cheap, and they are my favorite dishwashing tool and do not scratchstick pans.
I have also been told that their work on stone ware is excellent, such as stone ware sold by pampered chefs.
I have a craft bag next to the sofa filled with pre-
Cut off the net and the rope so that whenever I sit on the couch and watch TV, I can do some here and there to prevent my supply from running out.
This is the standard net I purchased-the-
Yard of fabric shop.
Usually you can find it in the wedding section, but be sure to buy a harder net instead of a tulle.
The tulle is too soft to be used as a scrubbies.
Three in two yards.
The net has many different colors, so you can customize them according to your d. ©Cole or this season.
I make these Christmas gifts with a combination of red, green and white.
For the form of packaging, you need to find two matching container covers with a diameter of about 6 inch (my container cover is 6 1/4) and (be careful) using X-cutting a hole of 1 3/4 \ "in the middle
A knife or a durable pair of scissors.
The standard bottle size is just right!
The easiest way is to track the circle in the center of the lid, then poke a hole in the middle and cut it out from there until the circle is completely cut off.
It is not necessarily perfect.
The net is detached from the longitudinal folded Bolt.
Keep folding like this, then fold twice again, matching the long edges, so it's about 7 inch from the edge to the edge (you can fold a part at a time if you have a long net ).
Strips need to be cut about 4 inch wide.
This is not necessarily accurate, but it seems to be the best bush.
If you have a rotary cutter, it will make it easier and faster for you, but the scissors work well too.
If you are going to use scissors, I suggest that you mark the lines (as shown above) with a pencil or ballpoint pen first and then cut them in order to cut the strips in a consistent width.
If you feel brave, you can fold the net again along the length (so it's 3 1/2 now) and guess 4 inch.
Here you can see how I use my transparent ruler to make measurements before cutting with a rotary cutter.
This really speeds up the process of cutting strips.
When I found out there was a net for sale, I would buy a few yards and go home and cut it into strips as my bag at once.
Put the two covers flat together, pick up one of them and insert one end through the center hole.
Grab the end of the back and press on the back cover so that the short side stays on the edge of the lid.
The long tail will hang loosely in front.
Pull the long tail up to the top of the lid and poke through the center hole from the back.
Gently pull until the net is close to the lid.
Don't pull too tight, you don't want to stretch the net or weaken it.
Keep packing and offset the strap a little while you go until you reach the end of the strap (see below ).
Here I continue to wrap the net around the disc, offsetting the straps, so about half of them cover the previous packaging.
Note that the strap is not long enough to go through the center hole again.
It doesn't matter, just wrap it up at the top and hold it down until you start the next strap.
Insert the end of the other band from front to back through the center, matching the edge to the disc, as mentioned earlier.
Clip the loose end of the last strap to the end of the new strap to keep it in place.
Wrap the remaining straps around the disc.
Continue adding new bars until a total of six are wrapped around the disc.
I found it helpful to count the straps in advance, so I didn't have to keep track of how many I put there. It\'s a Wrap!
What will this look like when all six are wrapped on the disc.
After that, all you need to do is cut it down and tie it up! Time to cut. . .
After finishing the packaging, as shown in the figure, turn the wrapped form sideways so that the last loose end is fixed on your hand.
Pick up the scissors and carefully insert the bottom blade between the two covers.
This is the trickiest part of the whole process.
Be careful, slow down so you don't cut yourself.
When you press, just swing a little and the scissors end up going between the covers and start cutting the net.
After completing the first cut, you can start to turn off the scissors to continue cutting.
Turn the table as you go and continue cutting.
Keep two fingers inside the center hole in order to keep the mesh in place when the cut is complete.
If you are having trouble moving the scissors, insert your thumb between the two covers and separate them a little so that there is more room to operate the scissors.
This is what it looks like when you cut all the way around the disc.
When it's done, you can start to see how it will go.
Just a few more steps to get it done! Tie it up!
Cut a 16 inch long cotton thread and loop between the covers, as shown in the figure.
Next, you will tie a series of knots to ensure the safety of scrubbie.
First, tie a standard knot and become the knot of a surgeon.
Hand knot, then wrap one end through the opening again, then tighten and tie again to secure it.
The surgeon's knots are convenient because when you tighten them, they will stay in place better and not relax like a single knot.
Wrap the rope around, tie two knots on the other side and pull hard.
Wrap it again (three sets of knots in total ).
Be sure to tighten the knot as comfortably as possible.
You don't want your little paparazzi to separate from the water for the first time.
Trim the extra rope and leave 1-
2 inch tails (they don't show up once the scrubbie is loose ).
Or, if you want to hang up your scrubbie, you can leave the tail of the rope long and tie them together to create a loop.
Interesting part here!
Gently pull the lid open so you can grab the middle of the scrubbie and move the lid away from each end until the lid is free.
Your paparazzi will come out like this.
All you have to do now is roll it up, roll it up with your hand and drag it to the end so it becomes a round ball.
Trim any long ends that stretch out and pull out any loose parts (these parts come from the strips wrapped at the end edge ). Ta Da! !
Check in for your new scrubbie!
These scrubbies are perfect for removing things stuck to gunk from the plate without scratching the surface.
When you're done with scrubbie, rinse it with warm water, shake to remove the excess water and leave it dry.
You'll know when it's time to say goodbye and take a new one out.
Located in Malaysia, this restaurant primarily serves authentic pork-free Chinese cuisine prepared with fresh, high-quality ingredients. All dishes are presented in a warm and inviting atmosphere, making it an ideal choice for family gatherings, special celebrations, or casual dining
Guangdong Hosen Two Eight Industrial Co.,Ltd. is a professional ceramic tableware manufacturer. It is committed to provide customers with one-stop purchasing service for hotel supplies and catering suppliers about 20 years by now. Sitemap
CONTACT US
Mobile: +86-18127955755 / 13694279549
E-mail: haoxin-2@28ceramics.com /
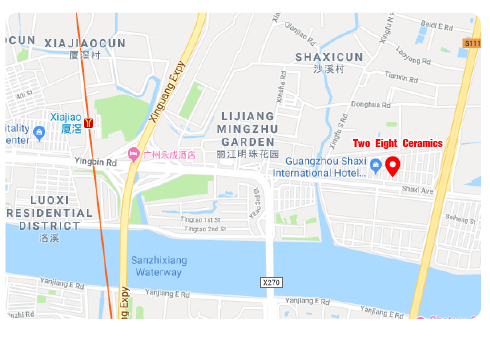
Office Address: 3/F-4/F, Shaxi International Hotel Supplies City, Shaxi Village, Guangzhou City, China
Factory Address: Ditou lndustrial Zone, Fengxi District, Chaozhou City, China